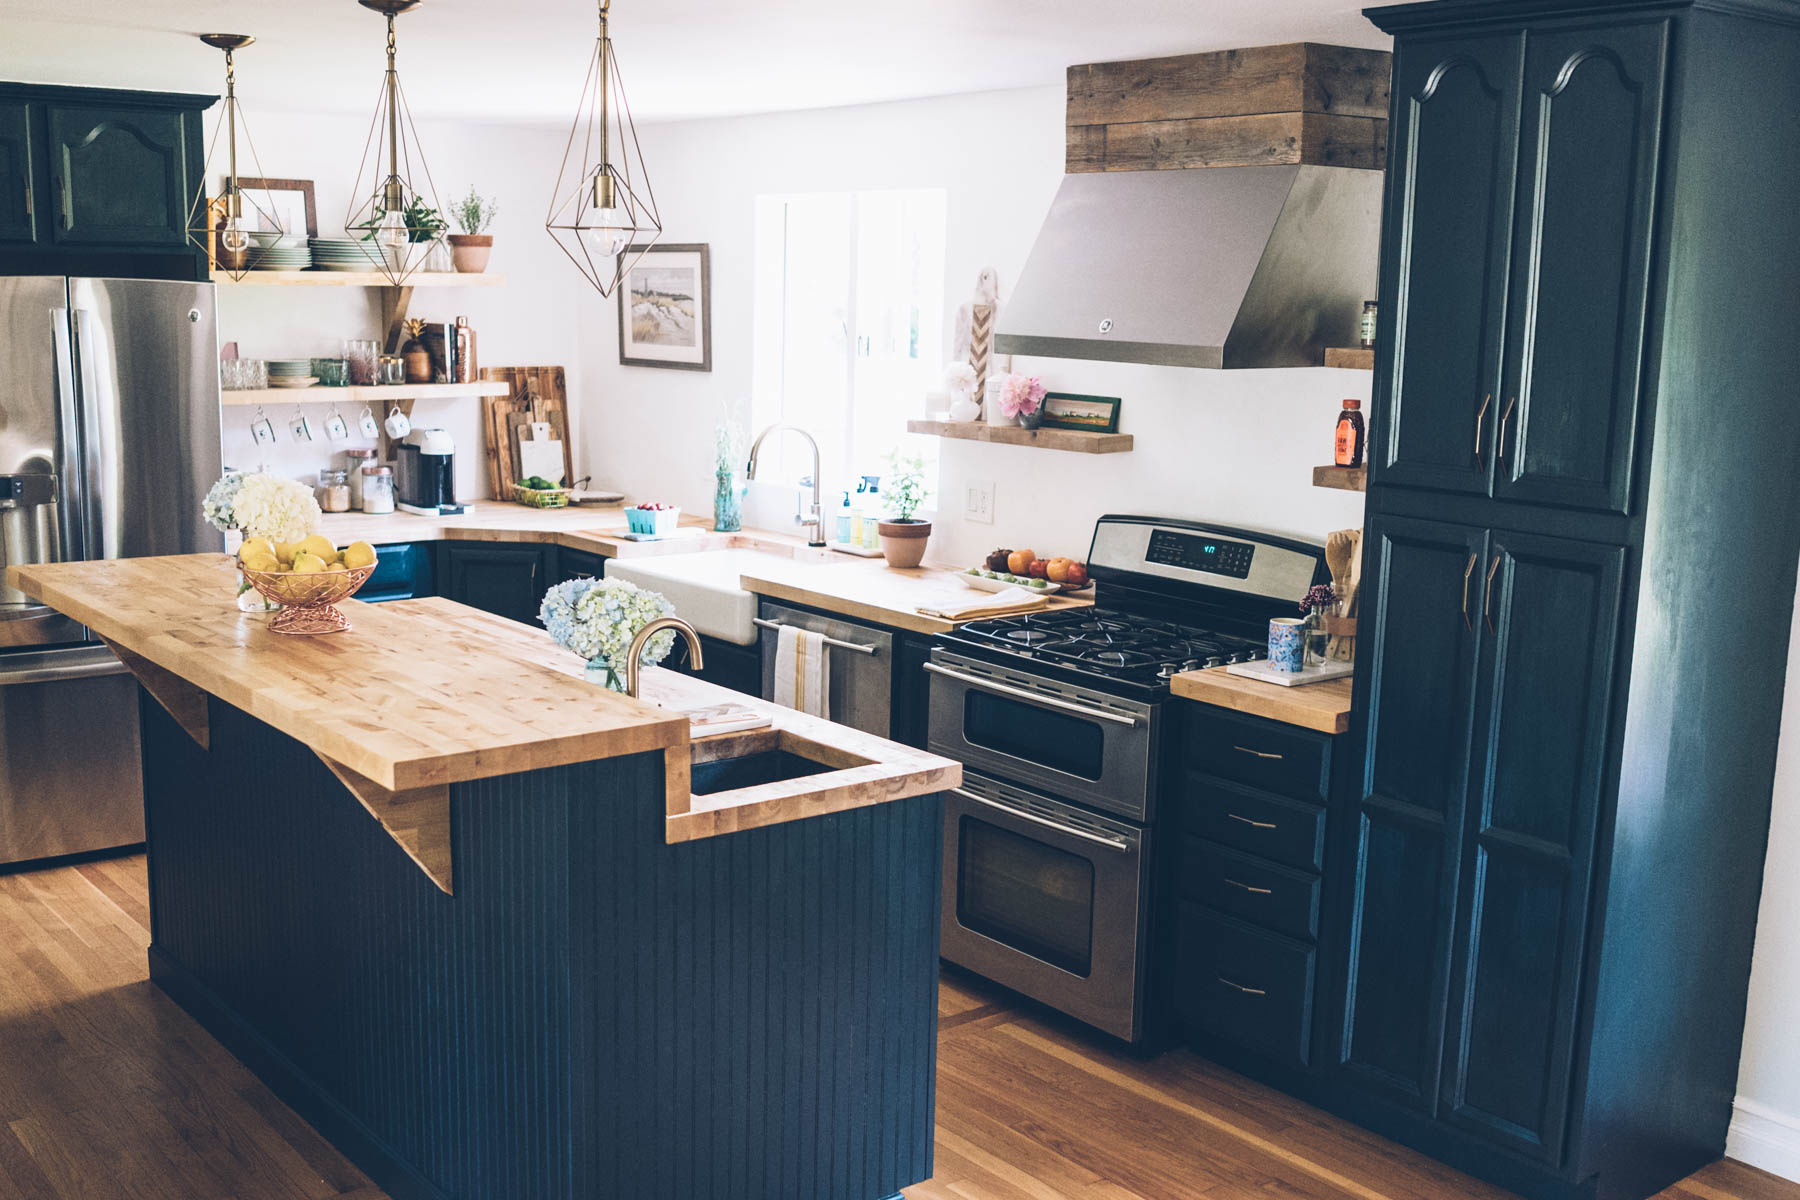
I honestly didn’t anticipate how long it would take me to write this post. It wasn’t until I started putting it together that I realized how much we actually did in our kitchen renovation (see the before here). While we didn’t change the layout we made a lot of improvements with the help of Lowe’s, and it feels like a whole new space. The entire process took about a month and a half, which includes some delays waiting for items to arrive (the range hood and farmhouse sink). Every morning when I wake up and make a cup of coffee I think to myself, I can’t believe this is my kitchen. We spent so much time researching, finding inspiration, shopping for paint, hardware and everything else we replaced, and the kitchen we have now is even better than I imagined. I decided to break the post out by each area so you can scroll down to see what we changed and how we did it.
The Island
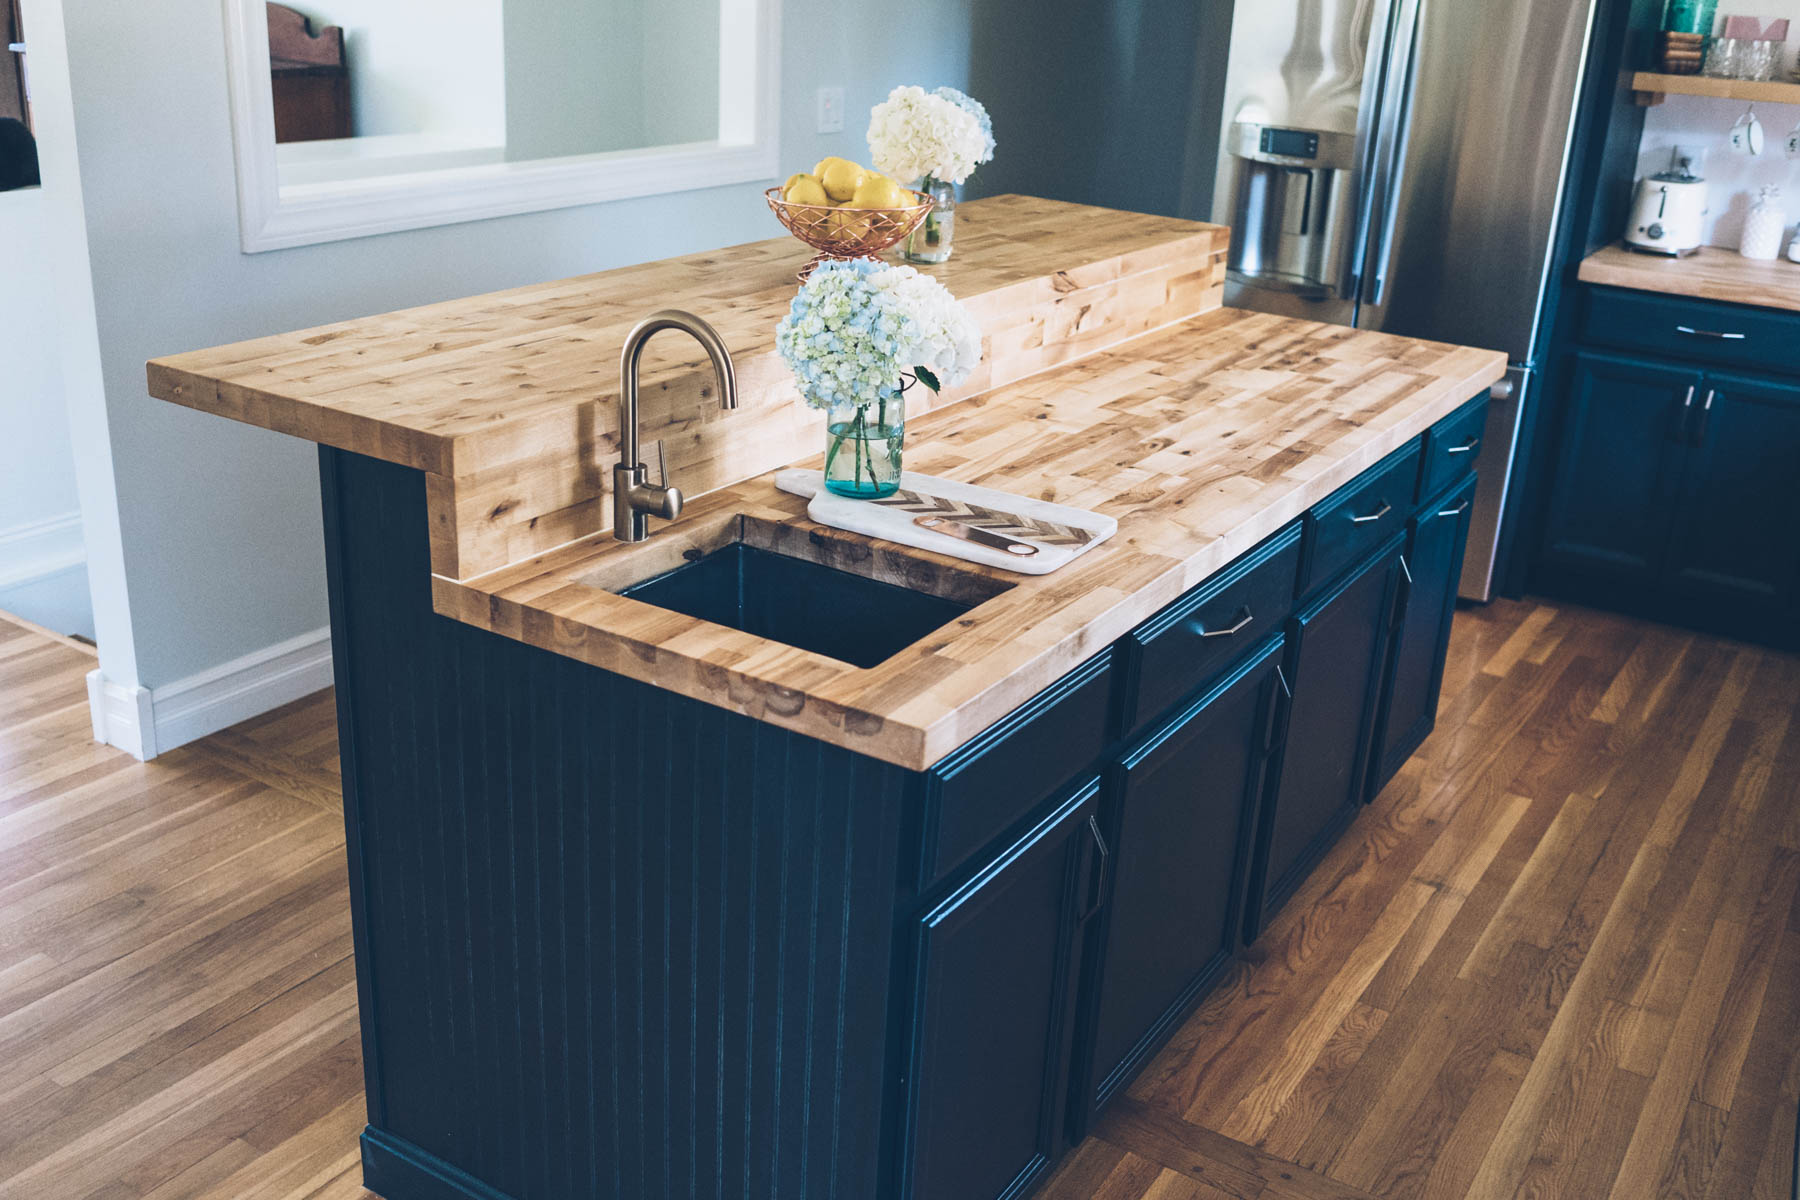
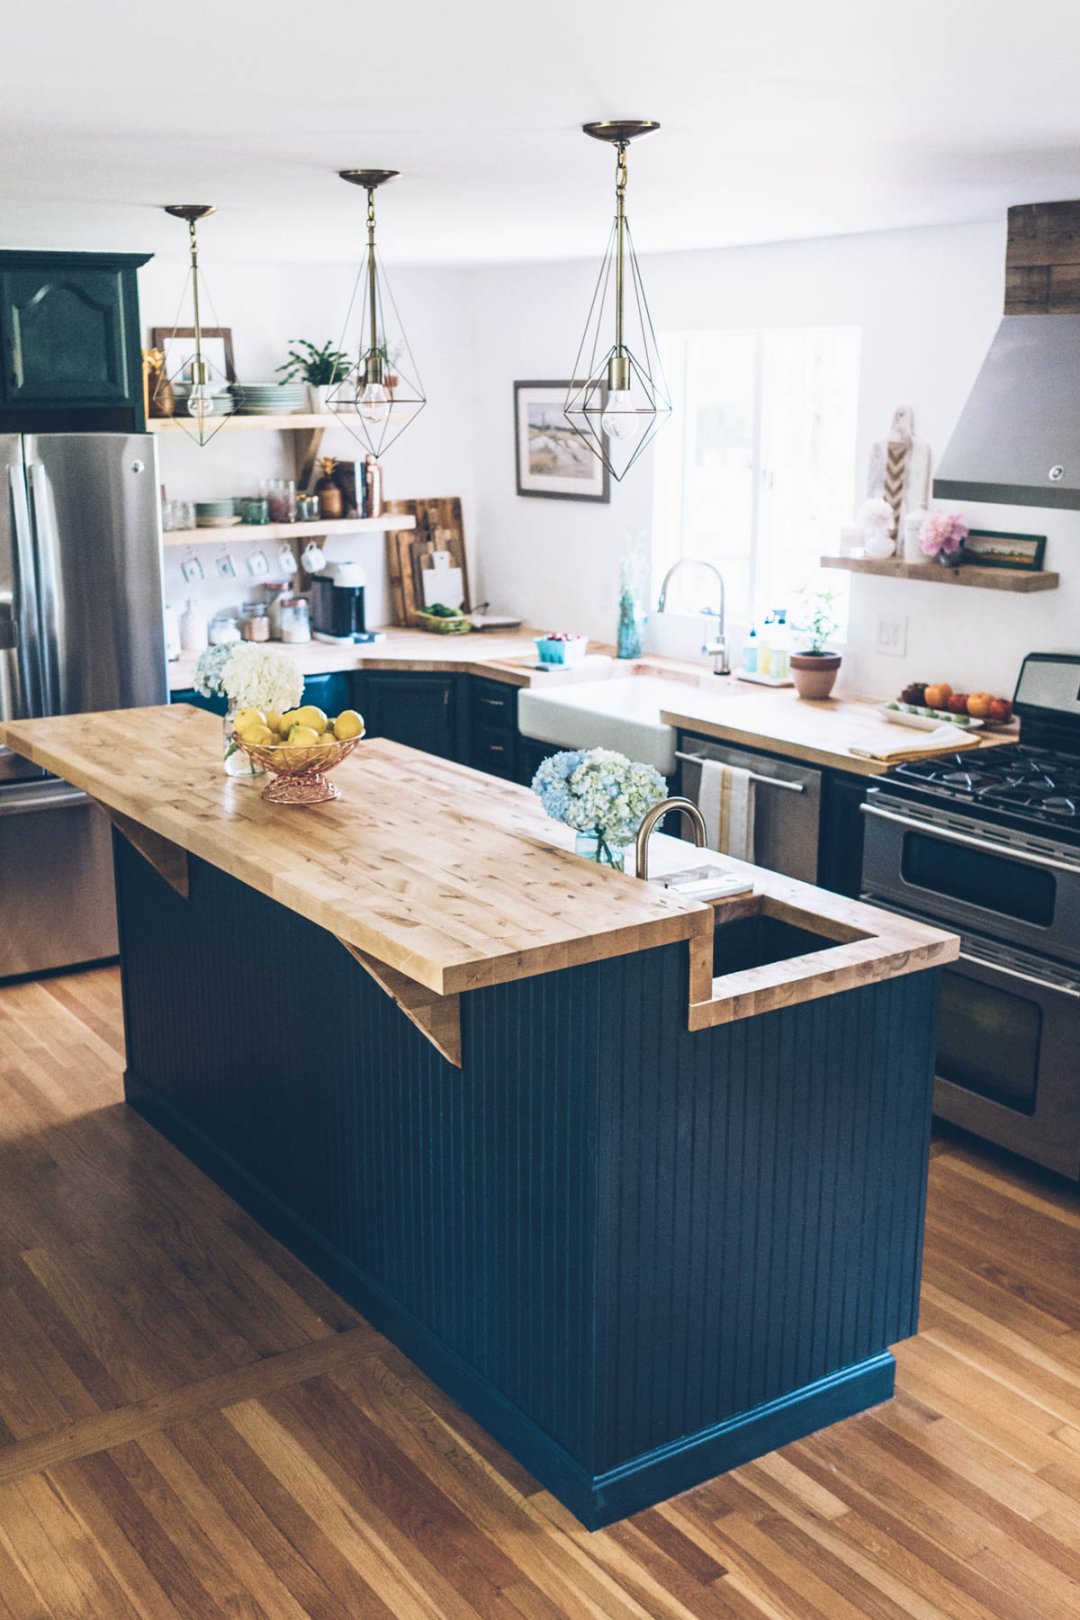
Adding a few fairly simple touches to the island we were able to give it a custom look and feel. Craig added natural wood beadboard panels and trim pieces to the corners and baseboard. The existing island had a cheap and flimsy look so adding the panels make it more sturdy and also add the country kitchen feel we wanted. We painted the panels and trim with Valspar Chalky paint making our own color mixing half Boot Black and half Ann’s Embroidery. We changed out the granite and replaced it with birch butcher block counter tops (sealed with satin water based poly). We kept the existing overhang and Craig used some extra pieces to create supports. We haven’t found barstools yet but we plan on using it as a place to eat once we do. We also replaced the old bar sink faucet with a new one from Delta in champagne bronze. The lighting really transformed the space and pulled it all together and they are SO affordable ($60!). I think we get more compliments on the pendant lights than anything else.
Range Hood
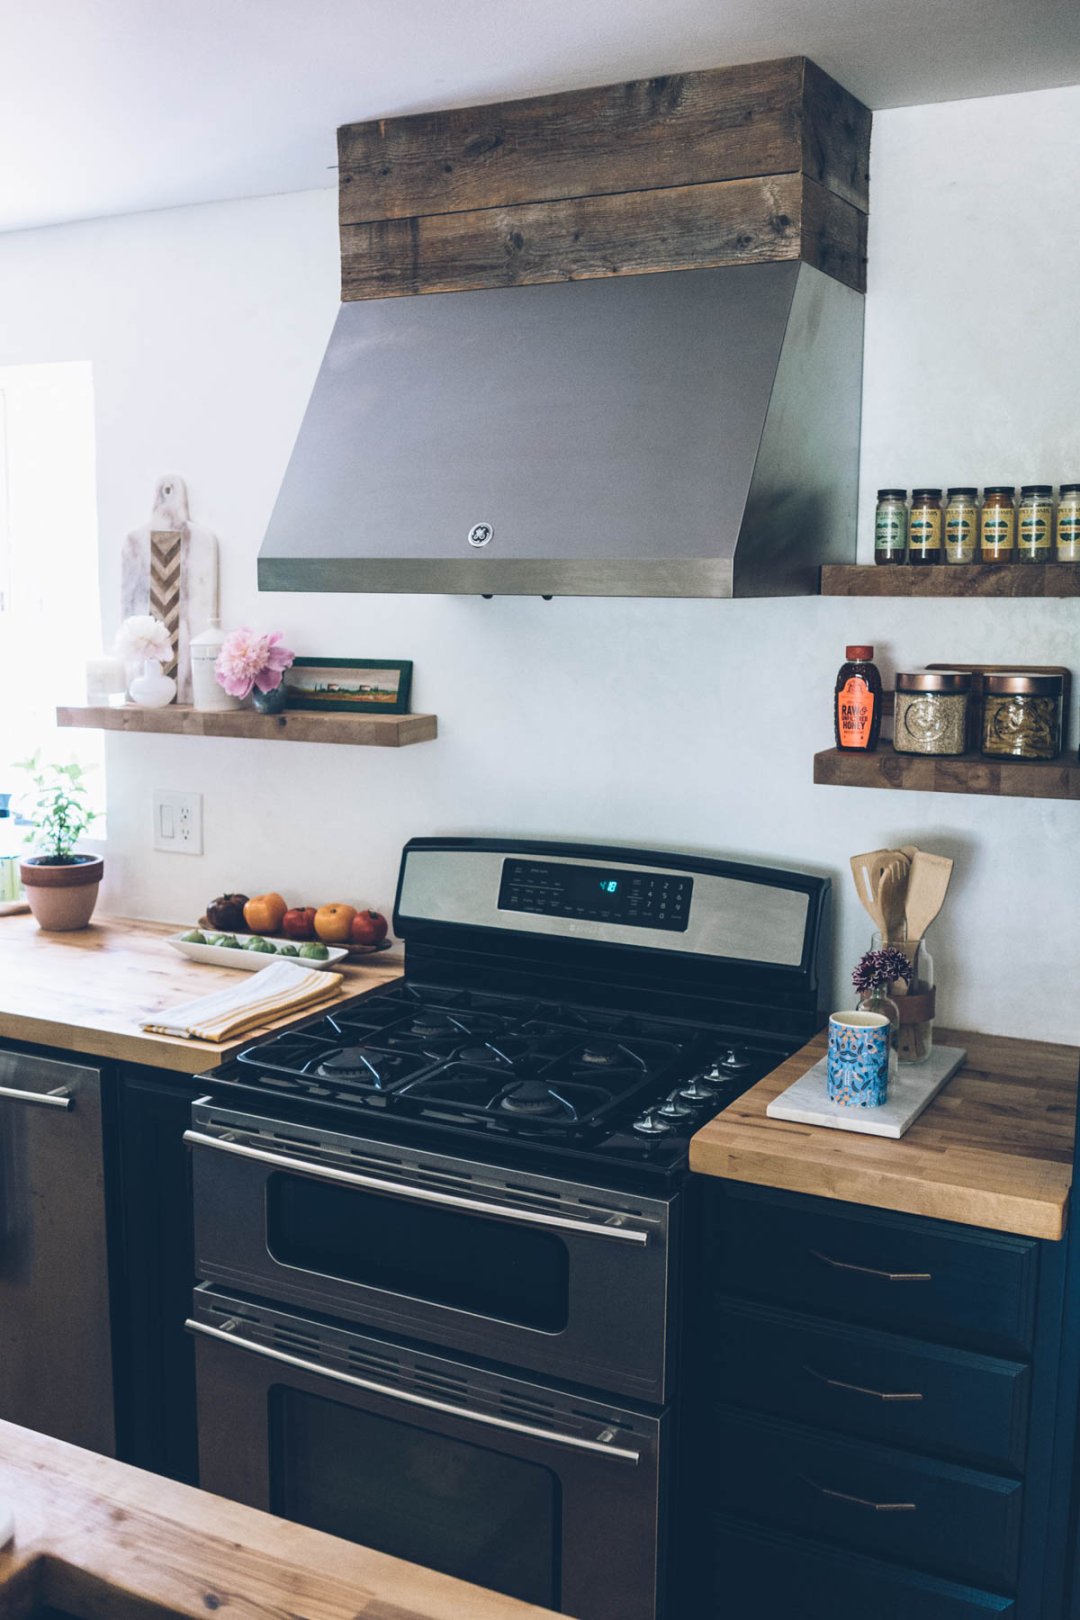
I have to give Craig credit for the range hood. Initially there was a microwave above the oven and I didn’t want to change it because I was afraid it would be too much work and I wasn’t sold on the look but I’m SO happy I let him talk me into it. It looks so much better with the range hood and the custom duct cover Craig made out of some palette wood we had from one of our deliveries. It also works much better than the old microwave venting. Last minute we added some additional floating shelves with some leftover pieces from the countertops. We lucked out and found these aged brass pulls that were the same size as the old cabinet drawer pulls. I highly recommend doing that when replacing hardware because it saves a ton of time. Otherwise we would have had to fill in the old holes and drill new ones in all the drawers. This way we just had to paint the cabinets and replace the hardware. We used a brush on water based poly to finish the cabinets. Typically with chalk paint you would use wax, but we tried several and none worked well with this particular brand. The water based poly went on easily and is a nice satin finish so the cabinets look slightly glossy. It also makes them easier to clean.
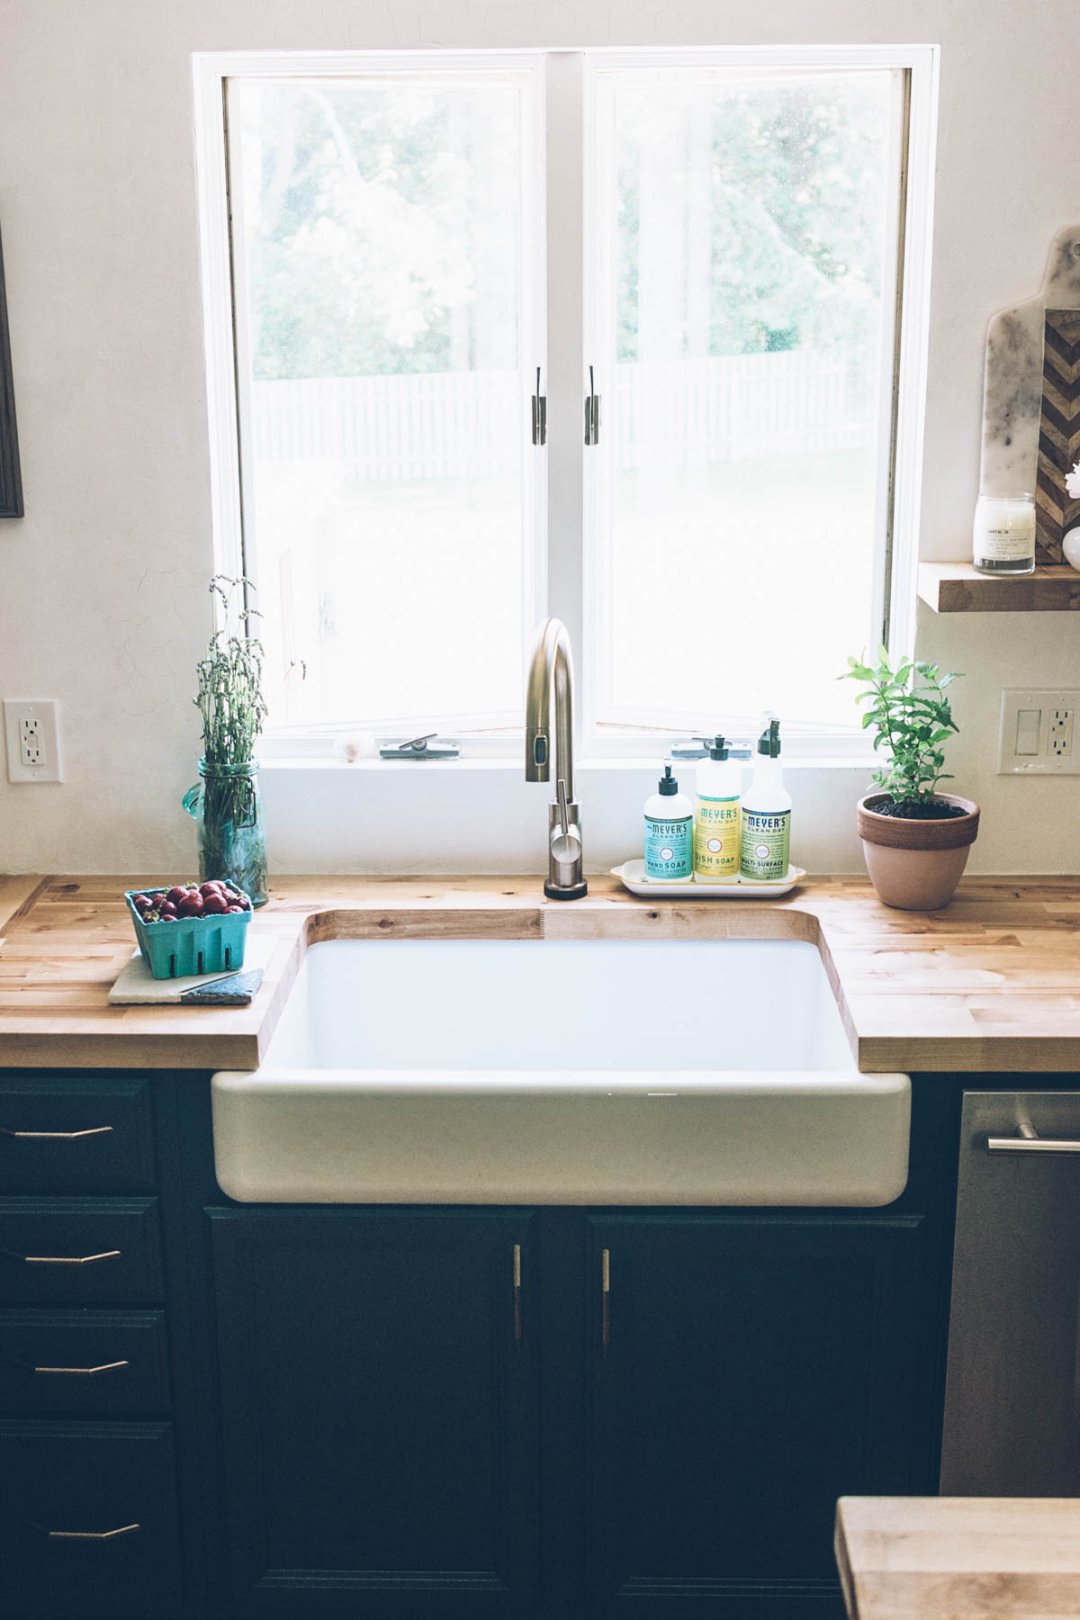
Farmhouse Sink & Brass Faucet
Not to play favorites but… The one thing I really, really wanted in our new kitchen was a farmhouse sink. It just has the perfect look and feel for the space. The tricky thing about farmhouse sinks is that they are typically huge and very deep. Luckily I was able to find this short apron style at Lowe’s so we didn’t have to make any changes to the existing cabinets. Paired with this Delta faucet it’s just so pretty I could stare at it all day. Make sure to keep this in mind if you’re renovating your kitchen. If you’re not replacing your cabinets measure to ensure the new sink will fit into the existing space. Trying to cut existing cabinets for a bigger sink is difficult and can end up being really expensive.
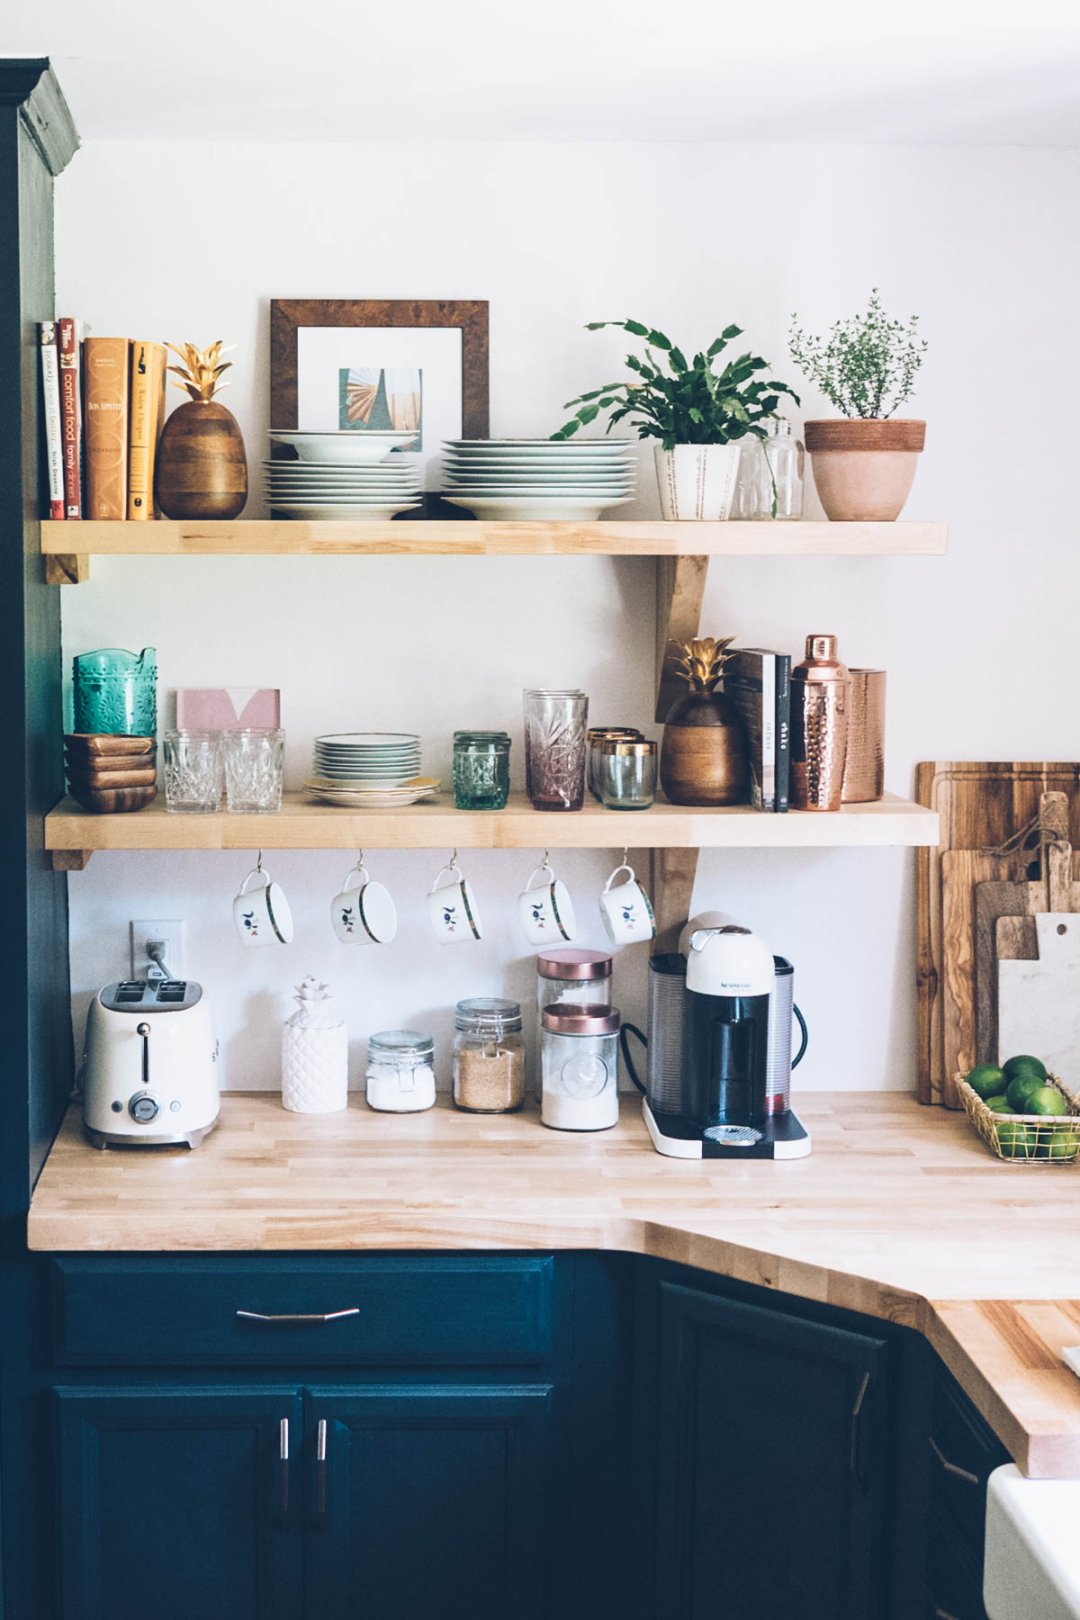
Open Shelving
Ripping out all of the upper cabinets made the kitchen look brighter and feel bigger. It also eliminated some storage so we decided to add open shelving as a solution. Using the wood from the counter tops Craig cut 1 foot deep shelves and made brackets from the same material. It’s another one of my favorite elements in the kitchen. Make sure when you’re installing shelving you screw them into the studs. It may sound obvious but it’s really important. When you’re renovating it’s something you really have to pay attention to because it will dictate where you can hang and install certain things. Fill your open shelving with a mix of things like recipe books, plates, glasses, and decor to make it feel more like home and less like a store display. Another thing to keep in mind when using open shelving is placement. Don’t put your glasses and dishes next to the stove or they’ll inevitably get greasy and dusty a lot quicker.
It’s kind of crazy to think that in a little under two months we were able to completely transform an old, dark and dated kitchen to this beautiful light and airy space that’s a combination of traditional New England and country cottage. We had so much fun picking out the different elements and seeing it all come together from the hardware to the sink to the countertops. I can’t thank Lowe’s enough for providing us with the materials to renovate our kitchen. It’s such an inviting and happy space. If you haven’t seen it, make sure to check out our video here which also includes a bit of the renovation process. Up next, the bathroom, stay tuned! I tried to link to everything pictured in this post but if you see something that isn’t just send me a note.
Shop the Post
Butcherblock Countertops (sealed with water based poly in satin finish)
Range Hood
Brass Pulls
Pendant Lights
Farmhouse Sink
Brass Faucet
Chalky Paint
Water Based Poly for Cabinets
Brass Bar Sink Faucet
Coffee Machine
Toaster
Pineapple Candle, Le Labo Candle
Wire Basket
Cutting Boards 1, 2, 3
Glasses 1, 2
Wood Bowls
Similar Mugs
Thank you so much to Lowe’s for providing us with all of the product to renovate our kitchen. As always all opinions expressed are my own.

Beautiful!
What a great update! I’m in love with the island.
You guys are seriously renovation MAGICIANS!!! I can’t believe how professional and impeccable this transformation is and it’s amazing how you guys had a hand in everything.
LOVE the dark cabinets, I was pumped when you were mentioning it on Insta-stories. It’s a bold decision and I think it totally paid off!
Love this so much! Gorgeous 🙂 I also loved your tips about finding the studs for open shelving and keeping things away from the stove – we had a shelf over the stove in an old apartment and everything was so nasty! haha
Can’t wait to see how the rest of the house unfolds! 🙂
xo christa
I love the butcherblock countertops! Do you have to finish off the wood or does it come finished?
Where did you get the butcher block counter tops from?
How did you seal your butcher block? Did you seal the shelves the same way? We keep sealing ours and the turn out orange:(
Kitchen looks incredible! Good work!!
Curious if you stained the counter top? We just bought the same butcher block from lowes but now realize for food safety, we can’t stain it?!
Hi Kayla, Thank you! We used this stuff https://www.lowes.com/pd/WATCO-16-fl-oz-Butcher-Block-Oil/3153369 and then maintain it with this https://www.lowes.com/pd/Howard-12-fl-oz-Oil-Based-Interior-Stain/999918606 We are debating putting a clear coat of poly on it though…we dont cut directly on it anyway so unless you’re actually using it as a cutting board you can just as easily clear coat it with a water based poly
In love with this reno!
For the cabinets – did you just use the Valspar Chalky paint? Or is there a coat of something else on top that creates that finish?
We used a water based poly over the chalky paint. The same one we used on the floors which I linked in our living room reveal!
Hi do you have the code for the paint? Tnx love everything!!
What color and brand are your cabinet pulls?
Beautiful! It really shows that you don’t have to have a giant space to have a great kitchen. Inspiring me to re-do mine!
Hi Jess! Absolutely LOVE how all of this turned out. Now that you’ve lived with the butcher block for a little while, how are they holding up? How often do you re-seal? I know you two use your kitchen frequently so I thought you’d be the perfect person to ask!
One of them isn’t sealed (with poly) at all and the one on the sink side was sealed with water based poly (we waxed them both but it wasn’t enough for the sink side to prevent water staining and cracking). They’ve held up pretty well, I think we will sand and seal the island one soon. I think it really depends on the wood and your climate. We’ve been pretty lucky with ours but I know someone that installed one similar timing as us and there’s is cracking and splitting a lot more. If there is drastic climate changes it can make the wood contract and expand which will make more splits and cracks (depending on the wood too).
Love the kitchen! For your little prep sink, what did you go with? I have a wood counter and a delta champagne bronze facet as part of my remodel but am not sure what color sink to go with for my prep sink. Thank you.
Thanks! This is the prep sink we have https://rstyle.me/+_xAEwcO1qiPLmsB00U62cw
How high is your bar top that extends out? We are redoing ours right now and trying to find the perfect height! Thanks !